Microcement over tiles, when it works and when it doesn't
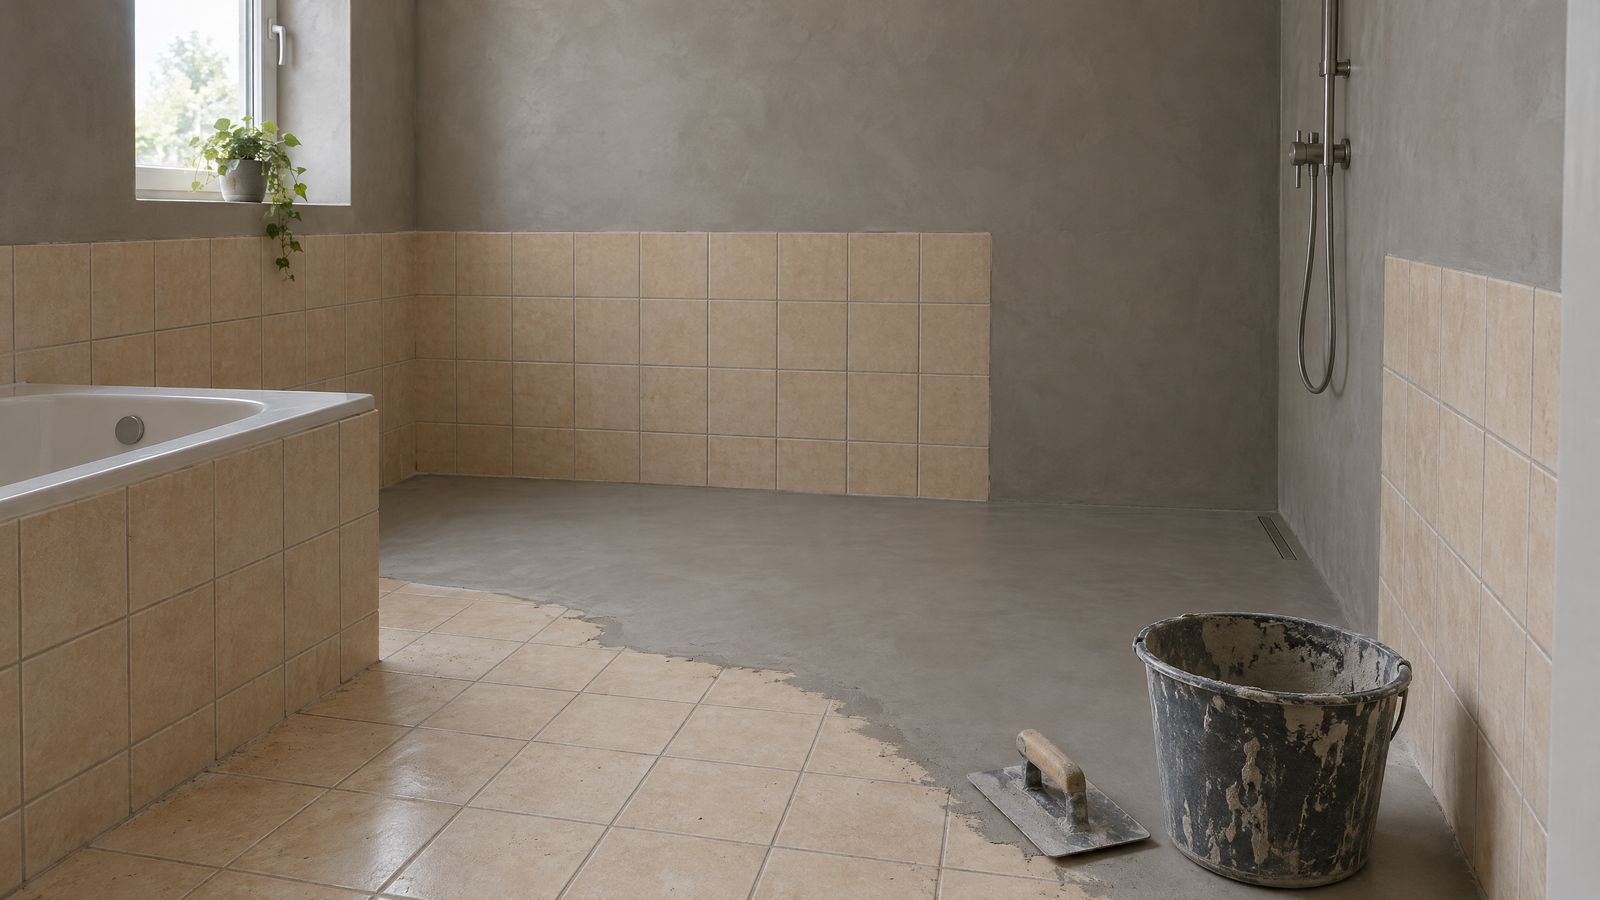
Microcement can go over existing tiles when they are firmly bonded, none of them move and tapping them gives no hollow sound. Then nothing is demolished: no chiselling, no rubble and no skip. Microcement is applied in 5 to 7 layers and the final layer is 1 to 2 mm thick. Individual loose tiles are dealt with during substrate preparation, and we decide after an on-site assessment.
Key facts
- Microcement goes over tiles, marble, terrazzo, plasterboard and wood, as long as the substrate is solid.
- It is applied by hand in 5 to 7 layers. The final layer is 1 to 2 mm thick.
- The finished surface is one continuous piece, with no grout lines and no edge between floor and wall.
- Installing the base system takes at least five days, plus time to prepare the substrate.
When can you put microcement over existing tiles?
Microcement can go over existing tiles when the tiles are firmly bonded, none of them move and tapping them gives no hollow sound. A substrate like that is stable, and microcement follows it without any problems. It is also the most common case for us, because it means renovating without demolition and without a skip.
Besides tiles, microcement also goes over marble, terrazzo, plasterboard and wood. The condition is the same: the substrate must be solid. You can see the list of substrates, systems and colours on the microcement page.
A quick check you can do yourself
- Walk across the floor and check whether any tile moves.
- Tap the tiles with the handle of a screwdriver. A hollow sound means the tile is not properly bonded.
- Look for cracked tiles. A crack running across several tiles can mean the substrate underneath is moving.
- Note where the drains, thresholds and doors are, because these are decided at the assessment.
This check does not replace a substrate assessment, but it helps you know what to ask. We make the final decision on site, before any material is ordered.
| Tile condition | What it means | What we do |
|---|---|---|
| Solid, no hollow sound | The substrate is stable | We prepare the surface and install microcement over the tiles |
| Individual tiles move | The problem is local | We fix them during substrate preparation, before the first layer |
| Cracked tiles | The crack may be coming from the substrate underneath | We assess the substrate and repair it before installation |
| Most tiles sound hollow | The substrate is not stable | We decide on the preparation at the assessment, before the quote |
When do tiles need repairing before microcement?
Tiles need repairing before microcement when they move, have come loose or have cracked because the substrate is moving. Microcement is a mineral material and follows the surface beneath it, so any instability carries through to the new surface. Whatever is not fixed during preparation shows up later as a crack.
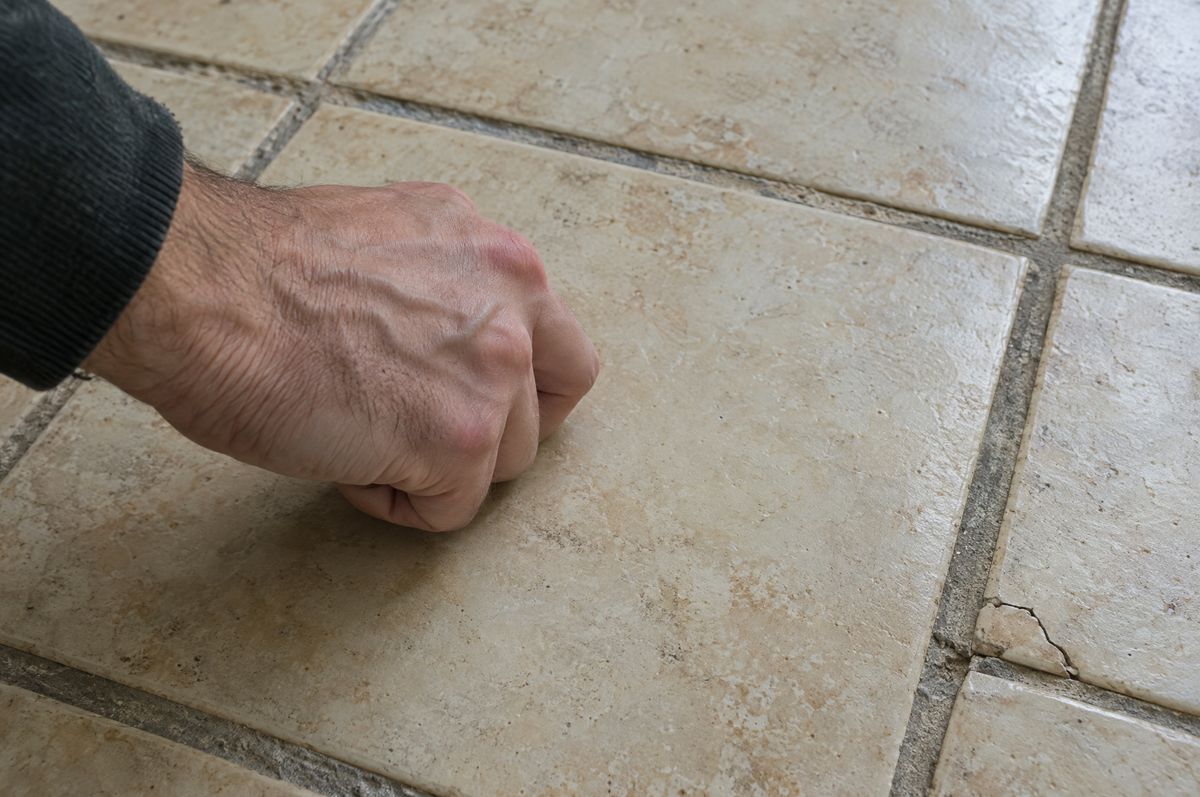
Individual loose tiles are dealt with during substrate preparation and listed in the quote. When the problem is wider, for example when the concrete slab underneath is cracking, the assessment shows what has to be repaired before the first layer.
That is why our substrate assessment comes before the quote. It shows whether there are any hidden costs, so you do not discover them halfway through the work.
What is not a reason to rip out tiles
An old colour, a dated pattern, yellowed grout or marble you no longer like are not reasons to remove tiles. If the substrate is solid, microcement goes over it and completely changes the look of the space.
How are tiles prepared for microcement?
Preparing tiles for microcement involves cleaning the surface, fixing loose tiles and cracks, and getting the surface ready for the first layer. The exact steps depend on the system, ARDEX panDOMO or FORCRETE, and on the condition of the tiles. Preparation is part of the quote and the price, so it helps to know what it covers.
- On-site assessment of the substrate, before the quote.
- Cleaning the tile surface.
- Fixing loose tiles and cracks.
- Preparing the surface for the first layer, according to the system being installed.
- In bathrooms and showers, waterproofing under the microcement.
- Applying 5 to 7 layers with a trowel, with drying time between layers.
- The protective topcoat in the sheen you choose: matt, satin or semi-gloss.
Installing the base system takes at least five days, plus time to prepare the substrate. You cannot live in the space during the work, because the layers must not be walked on while they dry.
The work is dry with no chiselling, so there is none of the dust that comes with removing tiles. What goes into the price of a job like this is covered in our article on how much microcement costs.
What happens to grout lines, thresholds and doors?
The grout lines of the existing tiles do not remain on the finished floor, because microcement is one surface with no joints. Thresholds and doors depend on the total thickness, which is not the same for every system and substrate. So thresholds and doors are decided at the substrate assessment, and the exact thickness is stated in the quote.
Grout lines
The finished floor has no grout lines, old or new. How the existing grout lines are levelled during preparation depends on the system and the condition of the tiles, so we check it on site.
Thickness and floor level
Microcement is applied in 5 to 7 layers and the final layer is 1 to 2 mm thick. The total thickness depends on the system chosen and on how much the substrate needs preparing. That is why we do not state it before the assessment.
Where the floor meets the wall
When the floor and walls are done in the same tone, you get one surface with no edge between floor and wall. Wall tiles in bathrooms and kitchens can also stay under the microcement, if they are solid.
How does a microcement bathroom renovation work without removing tiles?
A bathroom without demolition means the existing floor and wall tiles stay as the substrate, and microcement is installed over them with waterproofing underneath. There is no chiselling, no rubble and no skip outside the building. The floor, walls, a made-to-measure shower tray, washbasin and bath can all be one surface in the same tone, without a single joint.
What changes
- Waterproofing is laid under the microcement.
- We choose the protective topcoat according to how humid the room is.
- We make shower trays to measure, ready for microcement, with a linear or round drain.
- We make the washbasin and bath in the same material and tone.
What stays
Solid tiles stay as the substrate, and so does the bathroom layout, unless you are changing it. What is taken out before the work starts is agreed at the assessment, because it depends on the bathroom.
The shower
Microcement also goes into the shower, with a waterproof system and waterproofing underneath. Whether the existing tiles in the shower area can stay as the substrate is something we check at the assessment, as for the rest of the bathroom.
For a detailed comparison of the two options, read our article microcement vs tiles in the bathroom.
Painting tiles or microcement, what is the difference?
Painting tiles and microcement solve different problems. Paint changes the colour of existing tiles, but the grout lines, relief and layout stay visible, whereas microcement is a new surface in 5 to 7 layers, with no joints, that completely changes the look of a floor or wall. We do not paint tiles, so we compare them only in principle.
| Painting tiles | Microcement over tiles | |
|---|---|---|
| What you get | A new colour on the existing tiles | A new surface with no joints |
| Grout lines and tile layout | Still visible | Not visible, the surface is one continuous piece |
| Where floor meets wall | Stays as it was | Can have no edge, in the same tone |
| Texture | Flat, like the tile | Classic, Micro-Granite or Micro-Stone |
| Who does it | Usually the owner, with materials from a shop | A contractor, by hand, in layers |
| Protective finish | Depends on the paint chosen | A topcoat suited to the use, renewed without demolition |
Painting can be a quick refresh until a bigger renovation is planned. A surface without joints and a completely different look for the space are not something paint can give you.
How microcement holds up after years of use is covered in our article microcement pros and cons. To have your tiles assessed, send us the location and photos through the enquiry form.
Frequently asked questions
Can microcement go over tiles in a shower?
Microcement goes into the shower with a waterproof system and waterproofing underneath. Whether the existing tiles in the shower area can stay as the substrate is something we assess on site, as for the rest of the bathroom.
Do grout lines show through microcement?
No. A finished microcement surface is one continuous piece with no grout lines, old or new. How the existing grout lines are levelled during preparation depends on the system and the condition of the tiles, so we agree it at the substrate assessment, before the quote.
How much does microcement raise the floor level?
Microcement is applied in 5 to 7 layers and the final layer is 1 to 2 mm thick. The total thickness depends on the system chosen and on substrate preparation, so you get the exact figure in the quote.
Can microcement go over tiles with underfloor heating?
Microcement works over underfloor heating. The tiles underneath must be solid, as with any installation over tiles. We check the substrate at the assessment, before any material is ordered.
Is it better to paint tiles or use microcement?
Paint changes the colour, but the grout lines and tile layout stay visible. Microcement gives you a new surface without joints, in the texture and sheen you choose. The choice depends on whether you want a refresh or a completely new look for the space.
Can microcement go over wall tiles?
Yes, if the wall tiles are solid and not coming away from the wall. The floor and walls are then done in the same tone, giving one surface with no edge and no joint between them.